Pages

Tuesday, August 30, 2011

The Pink Peasant Shirt

Looking back at my last couple of sewing items, can you figure out that my lil' girl likes the color pink? So not to disappoint, a pink shirt.


The Facts

Fabric: 1 yard of Riley's Blake Hoo's in the Forest
Pattern: Simplicity 5222
Year: c. 2004Notions: Single fold bias tape, 1/4 inch elastic, eyelet lace trim
Time to complete: about 2 hours
What I'd Change/Changes Made: I put the elastic around the waist before assembling. I also finished all of the seams with french seams. This did make it a little bulky at the seams but has a nice finished look to it. If I made it again, I would definately finish the seams on the arms before assembling to shoulders. There wasn't a lot of room between the seam and the elastic in the sleeve so it made pressing the hem difficult.

I know we live in Wisconsin and short sleeves aren't practical but whenever making clothes, I want things that can go a couple of seasons. She can wear this throughout the fall and add a pink or white turtleneck underneath for the winter or a little button down sweater. The pattern ran big so I think (HOPE) she can wear it again in the spring.

I seriously want this in my size. It screams "I'm A Country Girl", especially with the little eyelet trim on the bottom. I can't wait to see Em all dressed up in her denim skirt and pink cowgirl boots.

Lisa
Photobucket

Friday, August 26, 2011

Ramblings

I love organization. I crave it. I like knowing EXACTLY where stuff is. I love bins and labels and pretty little things all in a row. However, seems that somewhere along the lines of having kids, my organization went kaplunk and with each kid it slid a little further to the worse. Now there was not just MY stuff to keep track of but the farmers, the farm, and one, then two, and now three kids. It also didn't help that before moving to the farm, the farmer and I each had houses that we had lived in for years but where each bigger than the farm house...

When I found out I was pregnant with our third, I knew I had to get back on track. We started by finally downsized to one checking account. We had kept an account locally but banked in the nearest "big" town. Then we could get cash and cash checks without having to either make trip that took an hour or get hit with bank fees. But having one would save time in tracking and reconciling.

We also started really getting the house in order. Craft and art supplies, sewing supplies, clothes, blankets, kitchen all got a little bit more order. The farmer got a planner he could keep in his bag so he knew about appointments, schedules, and so that I could put mine and the kids stuff in his and he could put his work stuff in mine so we were both on the same pages. The house was rearranged so it made best use of our space (this is still a work in progress). The only thing we (meaning I since I do all the finances) wasn't organized about was our finances. Everything was always paid and always paid on time but it's pretty much just kept in my head.

That has slowly started changing. It became important to finally tackle when we were working on a refinancing and we couldn't find a document we really needed. We had stuff in storage, stuff in a file cabinet in the attic, stuff in my file cabinets at the work table. When I did taxes last year I also spent too much time chasing down medical tax deductions and the rental property tax information. Not a good use of time for a mother of three.

I also went back to work this week part-time (that's why I've been kinda quiet this week). When I worked before I worked at night. Now I work in the morning so it's been an adjustment for all of us. The kids have to get up earlier to get to Grandma's, I have to get my butt outta bed before the sun comes up (that's not a pretty thought), and the farmer has to adjust to helping get everyone where they need to be with all the things they need to be there with!

I have a momAgenda (which I LOVE!). But it's bulky so it's hard to carry around. I looked at other planners and they have elements that I like but I don't want to plan weekly or it has just too many other things that I hate to spend money on something where I won't use half the stuff. So for next year I'm ordering another momAgenda calendar and carry the calendar but keep the binder at home. It has page protectors and when I have documents I need to keep for either reference or taxes, I just slide it into the write pocket and I know exactly where to find it. I also keep my website logins/passwords, important information like insurance, medical information, and phone numbers, etc. all in the binder.

I have my notetaker/organizer where I keep my grocery lists, etc. So I created a document to track our finances throughout the month. I can print it out and keep it in my calendar so it can continually be a working document.

This allows me do a budget each month but also put in actual incomes and expenses. The other side of the paper allows me to make notes about why expenses varied or if something is tax deductible. I also make notes on the rental property like cleaning expenses when someone moves out and leaves with no notice and leaves half of their belongings and what looked like 2-3 months worth of garbage...just sayin'.

I'm more than happy to share my spreadsheet, shoot me an email if you'd like it and I'll send it right off!

Now I'm off to snuggle with my babies and keep on eye on the babe who went from, "Oh look, he's starting to crawl" to "He can get from one end of the house to the other in 2.2 seconds and is quieter than a mouse in the bread box."

Lisa

Monday, August 22, 2011

The "Pink Flowery" Dress

Another dress for school finished today. This is the same pattern I used for Em's Easter Dress. I love the way the dress flows and the rick rack, especially on this one since I snuck some green in!!


I made the same changes I did before. It calls for a zipper but I just added a placket so I could put on snaps. I also lengthened it by about 6 inches since sooner than we wish, we'll start heading into cooler weather and then she can wear it with tights and a turtleneck!

Lisa

Photobucket

Weight Loss and Motherhood

My weight has fluctuated my entire life. I was never fat but I was never skinny. My weight crept up in my mid20s and I'd fight to bring it down a little but then I fell in love with running and spent the rest of my 20s a skinny little minnie who could eat whatever she wanted.

And then I became pregnant with Emily. I had been told since I was 19 years old that I was infertile and could possibly get pregnant with invitro.  So imagine my surprise when the doctor told me I was pregnant. Eck gawds! How did that happen!

And my family and friends were escatic (the farmer and I too but we were also still in shock). So people told me I couldn't keep running. So I stopped. But I still ate like I was a runner. And then my girlfriend who I worked with would go down to the store at lunch and bring me back mashed potatoes with gravy and my all time favorite cheese potatoe chips with creamy coleslaw (yeah okay so that one is a little weird but boy is it good!).

I tried starting to exercise again after Em was born but being a new mother, just adjusting to motherhood was hard enough. With Connor I didn't lose any weight but I didn't gain any extra and with my last I gained an extra 35 pounds.

Luckily at 5'7" I've always been able to carry extra weight but now I want to lose 60-65 pounds. I started exercising which is still hard with three little kids but my biggest struggle is food.

I. LOVE. FOOD.

Another blogger shared her weight loss struggles and stories and her success with a program called Lose It! So I signed up. It's been a week and I really like the program.

It similiar to weight watcher which I've done in the past. It's a free program that allows you to keep track of your calories and exercises. It also gives you a "Nutrient Report" showing where your calories are coming from. For me, that's helpful because I tend to ignore carbs (good and bad) which isn't a good thing when dieting so it reminds me to add in a little more good carbs.

Having a program like this is important to me because it holds me accountable for every little bite I put into my mouth. I stop and think about whether I really want it to count and sometimes if I do want to count it means giving up something else during the day.

Being accountable also keeps me from munching on the kid's leftovers!

Lisa

Saturday, August 20, 2011

Cloth Diapers – Part 1 Types of Cloth Diapers

I started out my cloth diapering series discussing my choice to cloth diaper along with the cost of cloth versus disposables, environment, and health concerns in the use of disposable diapers. You can read that initial post here. This post will discuss types of cloth diapers that I use or have used and links to some of my favorite cloth diaper patterns. There are many other types of diapers but I just want to cover what I’ve used.
Types of Cloth Diapers
AIO (All-in-One) or AIO2 (All-in-One Two)

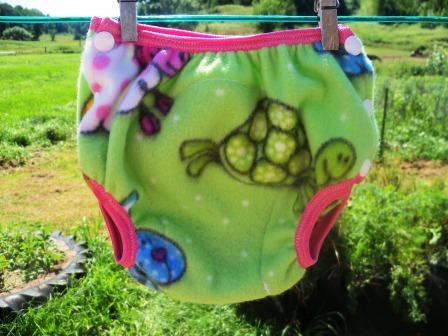
An AIO or AIO2 is most similar to a disposable diaper. There is no need for a separate cover. They are easy to use and often quite popular with dads, grandparents, babysitters, and daycares. AIOs have a waterproof outer layer that it typically made of PUL (polyurethane laminate) fabric. Other fabric choices for the outer layer may be fleece, nylon ripstop, ultrex or wool.  The benefit of an AIO2 over an AIO is a matter of preference although an AIO2 will have a shorter drying time. The inner layer of fabric in an AIO diaper may be made of microfleece, Sherpa, cotton knit, terry cloth, hemp, velour, and flannel. Common choices for the soaker are hemp, knit terry, Sherpa, French terry, flannel, microfiber and zorb.

The difference between an AIO and an AIO2 is how the soaker is attached. An AIO diaper will have an internal, hidden soaker while an AIO2 will have an external soaker that lays or snaps onto the inner layer of the diaper.
Prefolds

A prefold is a flat that has been pre-folded, usually seen as 4x6x4 or 4x8x4. The numbers represent how many layers of fabric meaning the outside layers each of 4 layers while the inside layer has 6 or 8 layers. A prefold is also folded around the baby and closed with diaper pins or a snappy. Prefolds can also be used as soakers in pocket diapers or added as booster to any type of diaper.

Prefolds are very economical, dry quickly and can be used for infancy through potty training and then used as cleaning rags, etc. Prefolds will require a cover. I’ve turned my prefolds into side snapping diapers instead of having to use diaper pins or a snappy.
Fitted

A fitted diaper resembles a regular diaper but requires a separate cover. Fitted diapers are made of a variety of materials and are closed with either snaps or Velcro (aplix).
Covers

Covers are needed for flats and prefolds, fitted diapers, and some pocket diapers. Covers are typically made of wool, fleece, or PUL.

The positive aspect of using a diapering system that uses covers is that you don’t have to have a large number of covers since covers do not have to be used after every change. You can very easily get by with 3 or 4 covers and have a nice stash of fitted or prefolds. Just change the diaper and only change the cover if it becomes soiled. Throughout the day, I rotate covers when I change a diaper. I turn the cover inside out and hang over the edge of the tub to dry. Wool can be lanolized (I’ve also had of people also lanolizing fleece covers) and only needs to be washed every 3-4 weeks. I do wash my fleece and PUL covers at the end of the day (or every other day) with the rest of the diapers.

Diaper Patterns
http://www.diapersewing.com/

This is a great resource that covers patterns for almost everything diaper related, I think the only thing she doesn’t cover is pocket diapers. This was one of the first websites I found when I started cloth diapering and making my own diapers. It does not include patterns but there is a lot of information. She even covers making cloth menstrual pads. Another great resource with a fabulously detailed tutorial for cloth menstrual pads is Moo Said the Mama (Also a great resource for a lot of things and posts some really great recipes!)
http://kaylasclothkits.com/

I’ve sewn this and it is a great pattern. Makes a nice diaper with good coverage. Only downfall is that if you don’t like Velcro (aplix), you have to modify the wings for snaps.
http://handmadebyrita.blogspot.com/

I have not made this pattern but on diaper boards it always receives praises. This is a free pattern.
http://katrinassqs.blogspot.com/2007/10/free-soaker-pattern.html

This is a free pattern. Katrina’s soaker is probably the most popular fleece soaker pattern. If you search fleece soakers on etsy.com or hyenacart.com, 90% probably use this pattern. Why? It’s a great pattern, its super simple, and you can whip up a fleece soaker in about 20 minutes from cutting the fabric to putting it on the baby. I like my fleece soakers made from this pattern, they offer great protection and great coverage. The only downfall is that I think it can get bulky which is why I also make a fleece soaker with foldover elastic at the legs and waist to reduce bulk underneath clothing.  
http://littlecomettails.kingstondesign.com/patterns.html

I have not used her for sale pattern but have used the free pattern on her blog and another great pattern. Both also get great reviews from other mamas. I like side snapping diapers and trainers so this one is right up my alley. Also did a cloth swim diaper tutorial on Sew Mama Sew earlier this summer.  
http://www.darlingdiapers.com/

I have this pattern and love it. Talk about a pattern that is worth its money. It covers serged and turned diapers, side closing or front closing, snaps or Velcro, square wings, rounded wings, one row, two row, fitted, pocket fitted, AIO, AIO2, waterproof pockets, covers. It’s even got a flow chart to help you decide!
http://www.chloetoesboutique.com/

I have not used this pattern but another one that gets great reviews. Uses foldover elastic to bind the internal and external layers.
http://fernandfaerie.com/sewing_fitteds.html

This is a free tutorial for sewing a fitted diaper from recycled materials.

Trainer Patterns
Unfortunately, the only trainer pattern I’ve used is my own. Which I’ve now sized down so that it can also be used as a diaper, however, I have yet to create a pdf of it. One of these days (soon) I will have an entire eight hours to myself to devote to turning my pattern into pdfs.

Resources for Ready to Buy
This list is for work at home moms who sell cloth diapers, trainers, or cloth menstrual pads. You can also search on etsy.com or hyenacart.com for a great selection.

Friday, August 19, 2011

Only a mom understands how true this is!


Pee Alone Card

Via Naughty Betty Inc Greeting Cards.

A Simple Skirt for School

I started some school sewing for my littlest one starting 4 YO Kindergarten this year.

This is just a simple skirt with an apron attached and a little pocket that was Em's request. Material is Riley Blake's Hoo's in the Forest and the yellow some that I picked up at a garage sale a couple of years ago.

Miss Em is into anything fashion-y so when I asked her if I could take her picture, she put together her little outfit and her sparkly shoes and out the door she went to "work it."


 I made it long enough so if she has another growth spurt in the next couple of weeks (she's been growing faster than the weeds in the backyard!) it will still be appropriate.


Someone didn't want to be left out of the pictures!

Lisa

Thursday, August 18, 2011

Apple Slices and a little mommy tenderness


This is my Gramma Betty's recipe. You gotta love those old bitty recipes cause they call for things like lard and a cup plus of sugar. I also love how she writes out recipes...straight out of her head like she's making them. But boy oh boy is this one good. Words in ( ) are me.

Apple Slices
2 1/2 c floud
2 T sugar
1 tsp salt
1 cup lard (or shortening)
Mix like a pie crust.
1 egg yoke in measuring cup and enough milk to make 2/3 cup liquid. Add to crust.
Roll out 1/2 to fit cookie sheet (I like mine thicker so I make in a 9x13 pan). Add 2 handfuls of crush corn or wheat flakes (I just frosted flakes since that's what I had on hand...nothing like upping the sugar ratio!).
Add sliced apples on top. (I just put a nice thick layer and I cut mine about 1/4 to 1/2 inch thick. My grandma makes hers really thin but she has more patience then me.)
Mix 1 cup sugar and 1 tsp. cinnamon and sprinkle over apples. (I keep about 1/4 cup out and sprinkle over top layer).
Roll other 1/2 for top crust.
Place over pan of apples and crust one beat egg white and spread over crust. (This is when I sprinkle on the rest of the cinnamon sugar).
Bake 40 minutes at 400 degrees. Remove from overn and pour glaze over top by adding water to 1 cup powdered sugar.


And my mommy tenderness moment...getting to see my baby crawl for the first time! Ugh at 6 1/2 months! Yikes!

I didn't get to see my first two crawl. I didn't get to see Emily takes her first steps. I did get to see Connor take his first steps (at 9 months old...yikes!!).

This is little man playing on the floor with me last night. He's been going about a three days now and is starting to get pretty good.

I do love his smile...gets me every. darned. time.

Lisa

Wednesday, August 17, 2011

Thomas the Train

One of my favorite things about little kids is how passionate they can be about something they like. Or is it obsessive? Thomas the Train is big in our household. I mean BIG, REALLY BIG. Borderline I'd think he had a problem if he wasn't 2 1/2!

Last time we went to Walmart to get some sewing notions, he beelined it straight for the Thomas material. Luckily, I love him enough to spend a whole yuppin' $2.50 to buy some material to make him a pair of pajama pants. He must have been good that day.  ;)


I used the same basic pants bottom that I use for all the kid's pajama bottoms. New Look 6641. It's quick and simple. Instead of a waist band, I used fold over elastic making this even quicker. From cutting to finishing the hem was under 30 minutes.

Lisa

Old Barns and Apple Trees

Yesterday we went and picked some apples at the place where the farmer cuts hay. We don't have a lot of land so we do sharecropping with several people. We either trade meat or we split the crop in half. The property has an old apple tree, plum tree and is covered in wild grapes. The people who live there don't want any of them and told us we could pick as much as we wantd. It's nice knowing people like this!  :)

These are the apples we picked.
This is the old barn. Isn't it gorgoues! I wish I could have gone instead but I only had flip flops on. It's covered in ivy and grapes!!

 The farmer's tractor.
 The plum tree.
 More wild grapes.
 Hay bales waiting to be brought home.
 Hay waiting to be baled.
 The farmer picking apples. It was a really big tree. We'll have to go back with a ladder.
 This used to scare me but oddly I'm getting used to seeing this kind of stuff. Although being used to it SHOULD scare me.

Lisa

Tuesday, August 16, 2011

Fleece Covers New in Shop

So yesterday I missed my deadline of putting something new into the shop. But I will say that I did have THREE items ready to list it was just that it was 11 o'clock at night and wasn't great picture weather.

I have two new side snapping fleece diaper covers. These are great for putting over a fitted or prefolds cloth diaper or for adding over your toddler's underwear during potty training! For great nighttime protection, add a pair of fleece shorties or longies over a regular AIO cloth diaper. I love my fleece covers but did not like the bulk around the thighs and waist for the fleece bands. Also, I didn't like trying to get a pull-up cover onto a baby or off a wet baby or toddler. You know how sometimes you have those conversations with yourself about something you'd like and then you even look around for that something...and then you realize that you could just make it yourself?? Yeah, so that's how these fleece covers came about. I love them...and so does the farmer! Dad approved...can't beat that!  :)


I will also be listing my first notetaker/mommy organizer in my etsy shop. And I have more that are in the works to be put into the shop - both covers and notetakers!

Lisa

Monday, August 15, 2011

More honey recipes

Both of these recipes, along with the lemonaide recipe from yesterday, are from kitchens of Neature's Nectar. This is where we order our bees and bee supplies from.

Honey Caramel Corn
1/2 cup butter or margarine
1/2 cup brown sugar
1/2 cup honey
Dash of salt
1/4 tsp. baking soda
3 quarts dry popped popcorn

Combine first four ingredients in saucepan; stir over high heat until mixture boils. Reduce heat to medium. Boil without stirring about three minutes to 265 degree. Remove from heat and stir in baking soda. Put popcorn in a large bowl. Slowly pour syrup and stir until coated. Turn onto greased cookie sheet. Bake 45 minutes at 250 degrees stirring every 15 minutes. Cool; break into serving-sized pieces. Store in an airtight container.

Honey Crinkles
3/4 cup butter or margarine
3/4 cup brown sugar, packed
1/4 cup honey
1 egg
2 cups all-purpose flour
1 tsp. each baking soda, cinnamon, and ginger
1/4 tsp. salt

In mixing bowl, cream first four ingredients until smooth and fluffly. Add remaining ingregients and mix well to make a smooth dough. Chill 10 minutes. Shape dough into 1" balls and roll in additional granulated sugar. Place on lightly greased cookie sheet. Drip 1-2 drops water on each cookie. Bake 275 degrees for 8-10 minutes until golden.

Lisa

Sunday, August 14, 2011

Honey Lemonaide

The farmer and I got to go on a "date" today. We went to a honey extraction seminar. Yeah, cause we're so exciting like that! :) And I forgot the camera so no pictures!

It was really neat and we did learn a lot. The first half of the seminar talked about getting bees ready for winter and caring for them over the winter. Even though this is our third year, we learned quite a few things that we weren't doing that will help our bees survive over the harsh winter we can have here in Wisconsin.

The second half of the seminar was back in the beekeepers honey house. He had brought in the supers off a couple of his hives and we cut to cut the caps with a hot knife, scrap with a fork, and use the extractor to empty the frames. Then we got to strain the honey and the second very best part of the seminar was that we got to bottle up some of the honey we extracted to take home.

The very best part of the seminar was the treats. The beekeeper's wife made honey cookies, honey popcorn, and honey lemonaide! I have recipes for the cookies and popcorn that I'll post tomorrow.

She didn't have a recipe for the honey lemonaide but told use that she fills her vessel (pitcher or cooler) with cold water, adds lemon juice and honey to taste. It was absolutely delicious.

The kids and I made a pitcher tonight when we got home. I used a pitcher of water, half a cup of lemon juice and half a cup of honey. The honey replaces any sugar you'd use to sweeten but adds such flavor I don't think I'll make my lemonaide any other way!

Lisa

Saturday, August 13, 2011

Slow but steady stash bustin'

I wanted to set a new goal for myself of adding one new item to my etsy shop daily. But then I did realize that since I already tend to over extend myself, my goal will be to add one new item every OTHER day. This will also help with slowly getting rid of the obscene amount of fabric I seem to have. And yes, my other goal is to not buy any fabric until half my fabric stash is gone. Which is alot. If I don't start sewing I may be having fabric withdrawal soon!

So I've listed a couple things in the past couple of days.


I've found that the easiest way to get things done is to cut multiple things at once. I made a bib and sleep sack for a baby shower gift but cut out four bibs and three sleep sacks. I have two more of fleece covers/soakers of that fabric cut out and ready to finish up.

I also choose every other day because I'm trying to get some clothes done for my daughter before school starts and I want to get curtains done for all three bedrooms. And I still have lots and lots and lots of canning and freezing to do yet this fall.

Lisa

Thursday, August 11, 2011

Is it Friday yet?

I'm trying to do too many things and everything seems to be going wrong.

I was sewing and my 2 year old was coloring on the table behind me. Next I hear a bump, an oops and then the sound of little things scattering across the floor.


This is my little organizer where I keep all of my snaps. One compartment for caps, one for sockets, and one for studs. Yeah, the whole thing went sliding off the table and across the floor.

I'm trying to look at the bright side of things in that at least I only have to sort by type, not color...

I have also been working on pickles this afternoon. I got the first batch in, started on the second batch, lifted the lid of the water bath to see if it was boiling and had a floater...a busted jar.

I'm still trying to find the bright side of that one...

Lisa

Wednesday, August 10, 2011

Mini-Moo

The other day, the farmer's dad brought home two new bull calves which always mean an impromptu trip the barn to meet the new little babies. We met this little guy and immediately named him mini-moo.

He's little. I laughed and said if he was 50 pounds it was because he had a feedsack on him. Here's another guy who was born the same time as mini-moo.


Emily has named him "Time Out" because he keeps hitting her with his tail. Look at the difference in their head size along! Mini-Moo is absolutely adorable. Except his beller. For a lil' guy, he is twice as loud as any other calf in the barn.

Lisa

Tuesday, August 9, 2011

Cloth Diapering

 
When I first mentioned to my mom that I was going to cloth diaper, she wrinkled her nose. My mom’s from the generation of crappy prefolds, pins, and plastic pants. Fast forward four years and I get a phone call from her one night telling me about the baby shower she was at where several of my aunts were discussing cloth diapering. My mom bragged that not only did I cloth diaper, I made my cloth diapers and I even sold them in a little boutique on the internet.

Being a crunchy in a non-crunchy community, I often get odd looks when I mention I cloth diaper – which is in no means any different from the odd looks about a lot of the things I do – but that’s 452 other blog posts explaining my “odd” lifestyle. After the odd looks come the questions. So I decided to write a couple of blog posts outlining cloth diapering (from my viewpoint) – types, materials, and care and washing.

Why do I cloth diaper?
I have an issue with buying things that are meant to be thrown away. This is also true for garbage bags but its two fold because not only do I have to buy a bag to throw things away, I have to buy a bag to throw away the bag I bought to throw things away in!
This in itself covers a couple of topics – cost and environment.
Cost
Disposables are expensive – even the store brands. However, that is not to say that there are not costs associated with cloth diapering. Diaperdecisions.com does a good article breaking down the cost comparison (including energy costs) of cloth versus disposable. So if you factor in energy costs, you’re still looking at savings of over $1,000 using cloth diapers. This is assuming that your child is potty trained by around age 2.
There are also ways to lower the cost of cloth diapers. Line drying will reduce the energy cost as well as looking for products made from WAHMs (Work at home moms). The quality is comparable to brand names and the cost is typically less than commercial brands. If you’re crafty, you can certainly make your own diapers and covers, greatly reducing the cost. The cover and diaper in this picture to the right was made from a piece of fleece from the remnant bin for $2.00, the prefold was from a pack I was given at my baby shower for burp cloths and I had the FOE (Foldover elastic) and snaps in my stash.   
The table at Diaperdecisions.com  also includes cloth diapering for every size from newborn through potty training. When looking into cloth diapers, I feel it is important to look at the timeframe the baby will spend in a particular size. Does a newborn need 36 diapers AIO (All-in-One) diapers that will fit for a relatively short time frame? For newborns, it may be more cost effective to use prefolds with a cover. You can also look at decreasing the amount of covers since covers don’t need to be changed every time and can be rinsed out and allowed to dry between uses.
Environment
Using the data again provided by diaperdecisions.com, using disposable diapers means approximately 6,762 diapers are being thrown away per child. PER CHILD!! That’s a scary thought. I worry about our environment and my, as well as my family’s, environmental footprint. I worry about what the chemicals in disposable diapers and what they are doing to our air and soil quality. I worry about the amount of time it takes for a disposable diaper to decompose.
Health
When I first started researching cloth diapers, I started stumbling across information about the types of chemicals in disposable diapers. Scary chemicals, chemicals with names that I can’t pronounce, chemicals that are harmful. Wanna know more? Read this article, The Diaper Drama by Heather L. Sanders.
My Cloth Diapering Experience
I get excited about cloth diapers. I love when people ask me questions. Why? (Sometimes accompanied with the weird look or a wrinkled nose.) But my favorite question is how. How does it work? Is it messy? But I don’t want to stick my hands into the toilet to wash BM? (Guess what – you’re supposed to shake out the BM in disposables also because it’s illegal to throw human waste into a landfill. Don’t believe me…look on your package of disposable diapers).
I am not the perfect cloth diapering mama. Em was started in disposable and switched to cloth when I found out I was pregnant and I realized I’d have to buy diapers for two. Thus began my cloth diapering experience. Con was my cloth diaper baby. Until he was a little over a year old. Then he started breaking out in horrible rashes. We tried switching from AIOs to prefolds and covers, wool covers, fleece covers, and just letting him wear a fitted with no cover. We tried powdering his bum, diaper rash creams, and we went to the doctor and got super whammy butt cream. I tried stripping the diapers, changing detergent, washing and then rewashing several times with no detergent. Finally, the doctor suggested we put a disposable on him for a couple days to help his bum get cleared up. Instantly his butt cleared up. So we went back to cloth and the rash came back. We tried changing his diet, the rash stayed as long as he had a cloth diaper on. I tried going to disposables at naptime and bedtime and changing him immediately. Nadda, nothing. Back into a disposable, rash went away. I finally gave in defeated and switched to disposables. My lil’ babe is in a mix of cloth and disposables. We use cloth at home but also disposables on longer trips outside the farm. And oddly enough, now that Con is older, he can wear cloth for potty training. Go figure!
My point isn’t to judge anyone who prefers disposables versus cloth. We all have different parenting styles and those are our choices. Each family needs to make choices based upon their lifestyle and what is right for their family and their child (ren) and their individual circumstances.
My goal in is to share my experiences and maybe a little knowledge.
Blessings,
Lisa

Monday, August 8, 2011

Appreciating our harvests

Gardening is an art form and like each different form of art, individuals appreciate gardening in different ways and at different levels. I grew up with my parents having a garden, its part of my parent’s home in the summer. When we grew older and my parents were gone for vacation over the summer, they’d leave instructions to stop by and harvest XYZ and take home what we picked. When I bought my first home, I grew a small garden in the backyard, just enough to have some fresh produce throughout the growing season.

When I moved onto the farm, the garden grew substantially – and oddly keeps growing every year – first out of the idea that as people who wanted a more sustainable lifestyle, this is what we needed to do.  We added chickens because we had a vision of what we wanted for our little farm. The farmer kept calling it a hobby farm and I kept thinking that for a hobby farm, it seemed like an awful lot of work at times. Over the years, we’ve added turkeys, sheep, and beef cattle. Some years we have ducks and geese. We’ve raised rabbits – all of whom were given away as pets because I could imagine eating them – and goats, a horse and a mule. We’ve started an orchard and began keeping bees. Through all of this, our vision has stayed the same, to raise fresh, natural fruits, vegetables, grains and meats. We wanted to lessen our carbon footprint by eating local and using less fossil fuels and creating less waste. Our vision has also expanded to include making a profit with our meat and honey and sometimes field crops.
But it is hard work, physically, mentally, and emotionally. You work long and hard for a goal and sometimes it can be crushing to walk out into the barn in the morning and find the calf or lamb you’ve been bottlefeeding and nurturing for weeks has died over night. You spend hours and hours AND HOURS tilling, planting, weeding, and watering your garden to have it destroyed by bugs, rain (or lack of), wind, or animals or to have very little grown.

There are years where your garden or farm is blessed with what it is producing. You work harder at harvesting, freezing, canning, pickling, etc. You wonder if it’s really worth all the hard work sometimes. You think to yourself, I can buy it on sale pretty cheap. Life continues to happen even during the busiest parts of harvesting no matter how hard you want it to just stop until you get caught up.
But this is when I really start to connect with what I’m doing because these tasks force me to slow down and they give me time to be within myself to think and process my thoughts. We have truly been blessed this year. This is our best year ever and we are truly thankful for our harvest. But also come with that the long days of extra work – picking and processing. The making of pickles and relish, the snapping and canning or freezing of green beans, the shredding of zucchini, and pick, shelling, and freezing of peas, etc.


Yesterday I sat in between rows of green beans and picked the basketful you see in the picture. It was quiet and peaceful and I thought about the smells surrounding me, the feel of the dirt, the joy that each plant was bringing me. I thought about fresh green beans for dinner and then again those beans being used over the long, cold winter months. The sun shine, the animals in the pasture, the chickens clucking about, and my kids running in and out of the garden as they ran to the barn to joyfully show daddy each new thing they found to pick in the garden. Tomatoes are beginning to ripen and each tomato they picked, they take off running to the barn to show daddy.
Yesterday was my AHA! moment where I felt all of my convictions come together – leading a natural lifestyle, leading a frugal lifestyle, being stewards to the earth, and being able to feed my family nutritionally as well as emotionally.

I always thought that because I was raised with a garden, the joy of the work involved would come naturally. For some, it might. For me, it’s been building. Each year I grow to enjoy the work a little more. This year I relish the time I can spend in the garden. I’m sure over the years, this will grow and lessen. Life will continue to happen and as the kids become older and are involved in more activities, some years the garden may take a backseat. There will be years where it does not produce as well and I struggle to appreciate what it does give us. There will be years where the heat or rain keeps me from enjoying my time the garden.
But I hope to always remember to take a lesson from my children and find joy in each little treasure the harvest gives us.

Blessings,
Lisa


Sunday, August 7, 2011

Garden Happenings

Have I mentioned before that the farmer likes to grow things? This year, I asked him nicely to please let's make the garden a little smaller but it seems to have grown again. He's also been trying for years to grow cucumbers so he can make pickles with no success. So this year he planted five (yes 5) packages of cucumber seeds.

This is the first picking.


Then a week later I picked these.


On Friday we picked green beans. The farmer planted five, 30 foot rows of green beans. This is the beans from 1 1/2 rows. I still have lots of picking to do.


And canning and freezing.

Did I mention that the farmer isn't so much into the canning and freezing part?

Lisa

Saturday, August 6, 2011

Baby Shower Gifts

Miss Em and I have a baby shower to attend today so I went to work yesterday putting together a little trio of my favorite baby things.

A carseat blanket. I still have the strap holes to cut but will wait until I can use the mom's carseat for a guideline.


A baby sleep sack. Initially I thought these would be great for when the baby was little. We use ours more now than the first couple of months. These are great for when they start kicking off their blankets. Logan wears one almost every night.


The baby apron. Seriously, what a great idea. I will be making up another 6-7 of these and getting rid of all of our little bibs.


I did make one already for the little man to see how it was put together. This has great coverage.


View from the back and of his little half-bald head from where he's rubbed all his hair off!


Blessings,
Lisa